Content:
Screencasting
There is another name for video tutorials where special programs are used. It is a screencast.
Screencasts are useful for demonstration program functions and for learning how to operate with it. In general, screencasts turned out to be an extremely useful tool of teaching people to operate with a computer or a specific instrument.
Planning
Creating a plan is a big step on the way to a complete video tutorial. In a word it is a script of your video. Creation of a tutorial will be based on it. This plan may be partially used as the subtitles or the description for your video tutorial.
Define the topic of the video tutorial. You may try and look at uCoz forum (there are lots of newbies asking for help. Why not to answer them in the most comprehensive way? Why not to make a video tutorial? It will increase the number of your video views and might provide you the first place in “Views leader” nomination).
Getting ready
Before we star creating a video tutorial, we need to get everything ready.
- Getting the workspace ready
Try to remove all the possible shortcuts and files from the desktop. Close all the unnecessary windows and detach the removable disks (if there are any) - Getting the browser ready
All the browsers participating in the recording should be put to order: clear caсhe and delete cookies history, return the standard skin, remove extra add-ons. - Operating system optimization
To record video tutorials you will need powerful resources of your computer that is why operating system optimization is needed. (it is necessary for “weak” computers) Disable Windows effects (if you use such operating system) like: menu shadows, list scrolling etc. It will reduce the load on the processor during the recording and reduce the size of the video file. - Resolution of the screen optimization
It is better to set up 1280х720 resolution (it is needed to have a video of the standard size, so it will not irritate with its strange proportions). If you have a TV monitor with a big resolution (where 1280х720 resolution is not convenient), use zoom in the program (otherwise your viewers will not be able to see anything) - Getting a pen and a piece of paper ready
Write down all the necessary for the video logins and passwords on the sheet of paper and put it in front of you. You need them in case you forget the login information. In this case you don’t need to press “Pause”, go and look for them. You will have everything ready.
Choosing Software
Choosing the program of recording a video tutorial is an important part of the screencast creation process. We have decided to simplify your task and to suggest 3 best programs for such tasks.
- TipCam Free
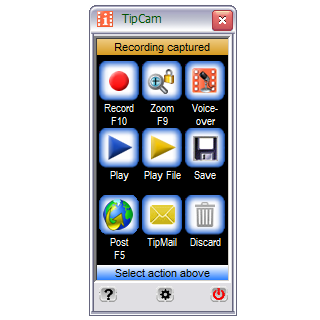
This program is so popular due to its handy and easy-in-use interface. Someone will say it is a “pro”, but others will surely go with “con”. All you need is to press “Record” button. - Camstudio Free
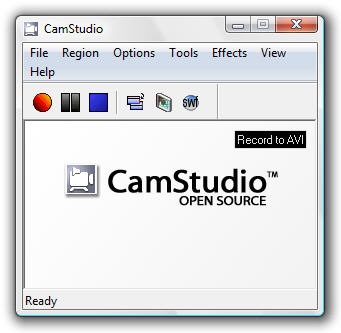
CamStudio is one of the most popular open source programs for recording video. Its window is less minimized, than the one in the previous program. It has much more features as well. If you want to make your first steps in screencast creation, it is better to make them with CamStudio. - Camtasia Studio $300 (30-day trial)
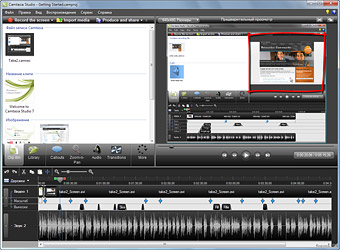
Camtasia Studio is a fully-functioning video editor for screencasting needs. You will find all you might need here: cursor effects, big size of a final video etc. The inbuilt video editor is pretty good. Try it yourself. But remember that in 30 day you will need either to pay 300$ or to stop using it.
Creating a video lesson with Camtasia Studio
- Setting up the program and operating with it
- Sound set up
If you have decided to record sound for the video, make sure its quality is satisfying. Remove the objects, which might make unnecessary noise. Remove the noise from the recorded audio file. - Video set up
One of the most important parameters in video recording is FPS value (Frames Per Second). You need to set it up before recording video. There is no way you can increase FPS after recording. This value is responsible for the smooth moves of the mouse at recording. But do not forget that the file size will increase, when the FPS value increases. - Cursor effects
There is an excellent feature in Camtasia “Make cursor editable with Camtasia Studio”. You will be able to add many effects to your cursor after applying this option. - Recording
Let’s start the recording. Do everything extremely slow. Always keep in mind that someone else will view it. Maybe “someone” has limited knowledge and basic computer skills. You do not need to be in a hurry.
When recording teaching videos you shouldn’t use keyboard much. Usage of such keys as: Enter, Tab, Ctrl+C, Ctrl+V, Alt+Tab, Ctrl+Alt+Del is unwilling. Just think how a user would know which keys you pressed. - Editing
Now, let’s start editing. Don’t be in a hurry.
Cutting video. Be very careful. If you cut out the important part, it will be really complicated to go on. Do not forget to cut out all the unsuccessful takes and tries to login. Users do not need to see them.
Cursor management and video effects. It is extremely important not to overuse various effects.
Increasing the speed of video playing. Do not be in a hurry. Pay attention to all the details. You may increase the speed, when typing the information. Remember, the video will be viewed by total novices. The majority of them have no clue what is going on the screen.
Zoom. It is a useful effect for those, who would like to make a video of a small size (640х360 - youtube standard), but of a good quality. - ...Saving, formats
Save your project and move on to exporting video into more convenient format for publishing. Camtasia Studio suggests several formats for saving your video: MP4, FLV, SWF, MOV, AVI, M4V, MP3, RM, CAMW, GIF. As you can see, all the popular formats are available. We suggest to choose MP4. It can be easily uploaded to Internet and viewed on your computer. Others might cause difficulties. - Subtitles
If your video doesn't have any sound explanations, subtitles will be extremely useful. Otherwise, the viewers would have to guess.
Now, some pieces of advice on how to use subtitles.
Do not make the time of displaying the subtitle too short (3 seconds minimum).
Do not make the subtitles too long (more than 40 characters). Divide the long subtitles into two short.
There is a couple of simple and handy programs for creating subtitles. They are Subtitle Workshop, Subtitle Edit . They are free and very comprehensive.
It is better to create annotations on youtube directly. (there is such a function there) - Publishing and sharing video
Few words about publishing your video on the Internet. I am sure you would like to show your video to your friends. How do you do it? There are plenty of services for publishing video. The most popular is youtube.com, of course. The best way is to publish your video on several services of such a kind. (see the list below) Follow the views and the comments. As a rule, viewers point out mistakes and inaccuracies. They might also suggest an excellent idea for the next video.


ustream.tv | pandora.tv | blip.tv | spike.com | revver.com | blogtv.com | howcast.com | qik.com | rutube.ru | smotri.com
We hope this instruction was useful and you are full of ideas for your screencast. Good luck!